初识numpy.array
在OpenCV中,很多Python
API是基于Numpy的,Numpy是Python的一种开源的数值计算扩展,用来处理多维数组。
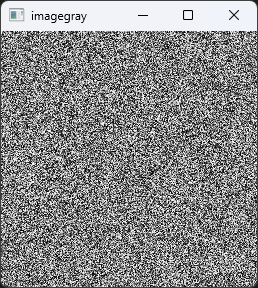
使用Numpy生成一个灰度图像,其中的像素均为随机数。代码如下:
1
2
3
4
5
6
7
8
| import cv2 as cv
import numpy as np
imagegray = np.random.randint(0,256,size=[256,256],dtype=np.uint8)
cv.imshow("imagegray",imagegray)
cv.waitKey()
cv.destroyAllWindows()
|
效果如下:
 屏幕截图 2025-01-19
182856.png
屏幕截图 2025-01-19
182856.png
加法运算
在面向Python的OpenCV中有两种方法可以实现图像的加法运算。一种是通过运算符“+”对图像进行加法运算,另一种是通过cv2.add()函数来实现对图像的加法运算。
因为计算机一般使用8个比特来表示灰度图像,所以像素值的范围是0~255。当像素值的和超过255时,这两种加法方式的处理方法是不一样的。
运算符“+”
具体规则如下:
\[
a + b =
\begin{cases}
a + b & \text{if $a + b \leq 255$,} \\
(a + b) \bmod 256 & \text{if $a + b > 255$.}
\end{cases}
\]
使用数组生成两个矩阵,观察“+”的效果:
1
2
3
4
5
6
7
| import numpy as np
image1 = np.random.randint(0, 256, size=[4, 4], dtype=np.uint8)
image2 = np.random.randint(0, 256, size=[4, 4], dtype=np.uint8)
print("image1=\n", image1)
print("image2=\n", image2)
print("image3=\n", image1+image2)
|
1
2
3
4
5
6
7
8
9
10
11
12
13
14
15
| image1=
[[252 205 149 77]
[217 239 20 27]
[ 43 11 78 164]
[230 91 139 85]]
image2=
[[111 154 251 239]
[ 30 17 97 111]
[149 129 62 3]
[ 58 200 110 239]]
image3=
[[107 103 144 60]
[247 0 117 138]
[192 140 140 167]
[ 32 35 249 68]]
|
cv2.add()函数
一般格式:
其规则如下:
\[
a + b =
\begin{cases}
a + b & \text{if $a + b \leq 255$,} \\
255 & \text{if $a + b > 255$.}
\end{cases}
\]
例如:
1
2
3
4
5
6
7
8
9
| import cv2 as cv
import numpy as np
image1 = np.random.randint(0, 256, size=[4, 4], dtype=np.uint8)
image2 = np.random.randint(0, 256, size=[4, 4], dtype=np.uint8)
image3 = cv.add(image1, image2)
print("image1=\n", image1)
print("image2=\n", image2)
print("image3=\n", image3)
|
1
2
3
4
5
6
7
8
9
10
11
12
13
14
15
| image1=
[[224 126 26 143]
[130 14 29 56]
[ 3 235 73 161]
[232 193 108 150]]
image2=
[[218 130 214 222]
[222 91 66 127]
[ 31 114 63 139]
[106 10 181 246]]
image3=
[[255 255 240 255]
[255 105 95 183]
[ 34 255 136 255]
[255 203 255 255]]
|
减法运算
在面向Python的OpenCV中有两种方法可以实现图像的减法运算。一种是通过运算符“-”对图像进行加法运算,另一种是通过cv2.subtract()函数来实现对图像的减法运算。
与加法运算类似,使用运算符“-”和cv2.subtract()函数进行减法运算时,对于超出范围的处理是不一样的。
运算符“-”
具体规则如下:
\[
a - b =
\begin{cases}
a - b & \text{if $a - b \geq 0$,} \\
((a - b) \bmod 255) + 1 & \text{if $a - b < 0$.}
\end{cases}
\]
使用数组生成两个矩阵,观察“-”的效果:
1
2
3
4
5
6
7
| import numpy as np
image1 = np.random.randint(0, 256, size=[4, 4], dtype=np.uint8)
image2 = np.random.randint(0, 256, size=[4, 4], dtype=np.uint8)
print("image1=\n", image1)
print("image2=\n", image2)
print("image3=\n", image1 - image2)
|
1
2
3
4
5
6
7
8
9
10
11
12
13
14
15
| image1=
[[178 121 213 90]
[225 151 123 70]
[174 32 66 155]
[112 107 173 23]]
image2=
[[102 193 48 91]
[246 246 250 78]
[ 84 162 133 147]
[239 155 137 36]]
image3=
[[ 76 184 165 255]
[235 161 129 248]
[ 90 126 189 8]
[129 208 36 243]]
|
cv2.subtract()函数
其规则如下:
\[
a - b =
\begin{cases}
a - b & \text{if $a - b \geq 0$,} \\
0 & \text{if $a - b < 0$.}
\end{cases}
\]
例如:
1
2
3
4
5
6
7
8
9
| import cv2 as cv
import numpy as np
image1 = np.random.randint(0, 256, size=[4, 4], dtype=np.uint8)
image2 = np.random.randint(0, 256, size=[4, 4], dtype=np.uint8)
image3 = cv.subtract(image1, image2)
print("image1=\n", image1)
print("image2=\n", image2)
print("image3=\n", image3)
|
1
2
3
4
5
6
7
8
9
10
11
12
13
14
15
| image1=
[[232 106 248 1]
[107 118 163 47]
[ 35 82 14 181]
[244 170 246 147]]
image2=
[[143 108 216 211]
[ 71 138 164 197]
[230 221 181 215]
[118 221 237 185]]
image3=
[[ 89 0 32 0]
[ 36 0 0 0]
[ 0 0 0 0]
[126 0 9 0]]
|
乘法运算
图像乘法运算有矩阵乘法和矩阵的点乘两种。面向Python的OpenCV提供了cv2.mutiply()函数进行矩阵的点乘运算,Python为矩阵的乘法运算提供了dot()函数。
矩阵乘法的一般格式为:
矩阵点乘的一般格式为:
1
| result = cv2.multiply(a, b)
|
注意:
矩阵点乘在结果大于255时,类似于加法运算,计算机会截断数据,取最大值。
除法运算
除法运算应用在图像中即为矩阵的点除运算,面向Python的OpenCV提供了cv2.divide()函数来进行像素矩阵的点除运算。其一般格式如下:
1
| result = cv2.divide(a, b)
|
示例代码:
1
2
3
4
5
6
7
8
9
| import cv2 as cv
import numpy as np
image1 = np.random.randint(0, 256, size=[4, 4], dtype=np.uint8)
image2 = np.random.randint(0, 256, size=[4, 4], dtype=np.uint8)
image3 = cv.divide(image1, image2)
print("image1=\n", image1)
print("image2=\n", image2)
print("image3=\n", image3)
|
1
2
3
4
5
6
7
8
9
10
11
12
13
14
15
| image1=
[[232 106 248 1]
[107 118 163 47]
[ 35 82 14 181]
[244 170 246 147]]
image2=
[[143 108 216 211]
[ 71 138 164 197]
[230 221 181 215]
[118 221 237 185]]
image3=
[[ 89 0 32 0]
[ 36 0 0 0]
[ 0 0 0 0]
[126 0 9 0]]
|
可以看到,矩阵点除运算的最终结果全是整数,这是因为像素的范围一般在0~255之间而且是整数,所以,当定义的随机矩阵是8位整型数时,在做除法运算时对结果将自动取整。
逻辑运算
按位与
OpenCV中的cv2.bitwise_and()函数用于进行按位与运算,其一般格式为:
1
| dst = cv2.bitwise_and(src1,src2[,mask])
|
- dst表示与输入值具有相同大小的输出值。
- src1表示第一个输入值。
- src2表示第二个输入值。
- mask表示可选操作掩码。
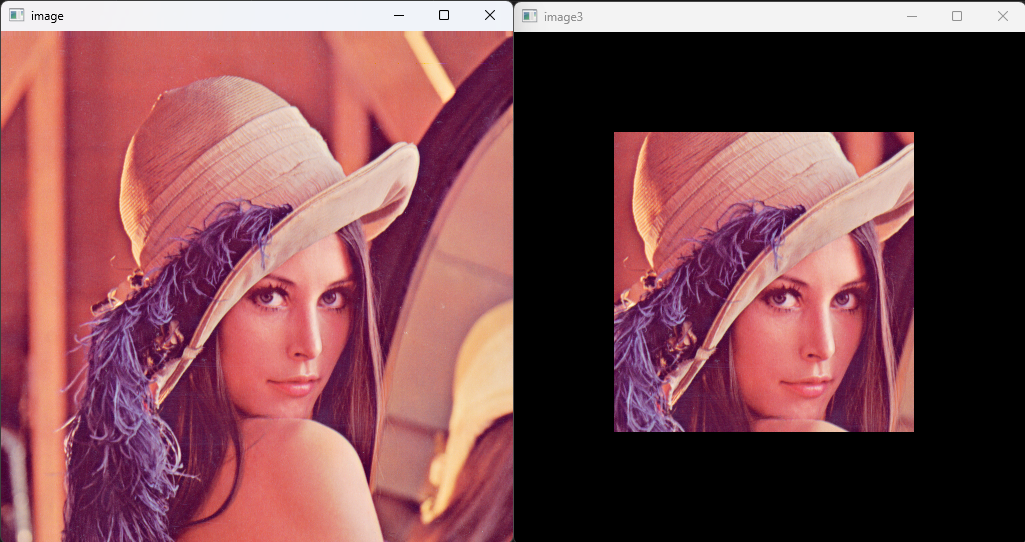
构造掩模,使用按位与操作保留掩模内的图像:
1
2
3
4
5
6
7
8
9
10
11
| import cv2 as cv
import numpy as np
image1 = cv.imread("pic/lena.png")
cv.imshow("image", image1)
image2 = np.zeros(image1.shape, dtype=np.uint8)
image2[100:400, 100:400] = 255
image3 = cv.bitwise_and(image1, image2)
cv.imshow("image3", image3)
cv.waitKey()
cv.destroyAllWindows()
|
运行效果:
 屏幕截图 2025-01-19
200150.png
屏幕截图 2025-01-19
200150.png
按位或
OpenCV中的cv2.bitwise_or()函数用于进行按位或运算,其一般格式为:
1
| dst = cv2.bitwise_or(src1,src2[,mask])
|
- dst表示与输入值具有相同大小的输出值。
- src1表示第一个输入值。
- src2表示第二个输入值。
- mask表示可选操作掩码。
按位非
OpenCV中的cv2.bitwise_not()函数用于按位非运算,其一般格式为:
1
| dst = cv2.bitwise_not(src[,mask])
|
- dst表示与输入值具有相同大小的输出值。
- src表示输入值。
- mask表示可选操作掩码。
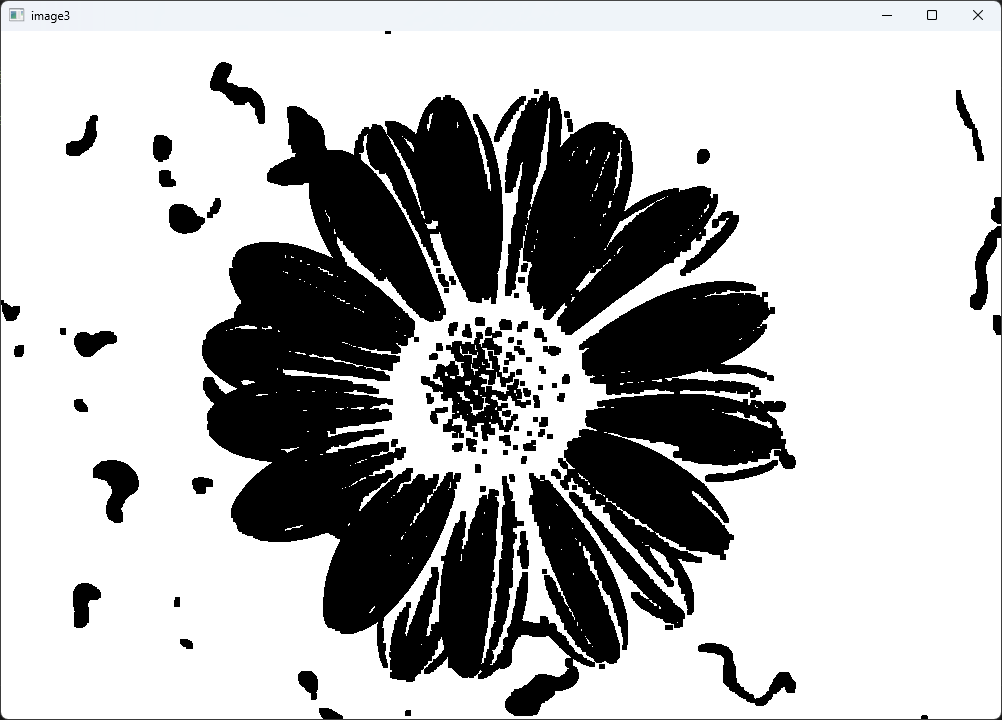
例如:
有原始图像:
.png) download-(5).png (1000×688)
download-(5).png (1000×688)
按位非:
1
2
3
4
5
6
7
8
| import cv2 as cv
image1 = cv.imread("pic/pic4.png")
cv.imshow("image", image1)
image3 = cv.bitwise_not(image1)
cv.imshow("image3", image3)
cv.waitKey()
cv.destroyAllWindows()
|
效果如下:
 屏幕截图 2025-01-19
201134.png
屏幕截图 2025-01-19
201134.png
按位异或
按位异或操作类似于半加运算。
异或运算真值表:
OpenCV中的cv2.bitwise_xor()函数用于按位异或运算,其一般格式为:
1
| dst = cv2.bitwise_xor(src1,src2[,mask])
|
- dst表示与输入值具有相同大小的输出值。
- src1表示第一个输入值。
- src2表示第二个输入值。
- mask表示可选操作掩码。
